")
In today's digital age, having a strong online presence is crucial for the success of any business. And when it comes to e-commerce, Shopify has emerged as one of the leading platforms for creating an online store. Whether you are a budding entrepreneur or an established business looking to expand your reach, this step-by-step guide will walk you through the process of creating a Shopify store. Once launched, CRO services can help maximize your store's conversion rates and unlocking your e-commerce potential. How to create a Shopify store?
Creating a Shopify Store in 2026: What's Changed
Shopify has evolved significantly since its earlier versions. Here are the key changes that affect how you create and launch a store in 2026:
- New trial structure: Shopify now offers a 3-day free trial followed by a $1/month introductory rate for the first 3 months, replacing the former 14-day trial.
- Updated pricing: The Basic plan is now $39/month ($29/month billed yearly), the Grow plan (formerly "Shopify") is $105/month, and Advanced is $399/month.
- AI-powered tools: Shopify Magic helps generate product descriptions, email subject lines, and store content using built-in AI—saving hours of manual work during setup.
- Checkout Extensibility: The old checkout.liquid is fully deprecated. New stores use Checkout Extensibility with Shopify Functions and UI extensions for custom checkout experiences.
- Shop Pay performance: Enabling Shopify Payments and Shop Pay gives you 1.91x better mobile conversion rates compared to standard checkout.
- Shopify Editions Winter '26: New platform features include Sidekick Pulse AI assistant, Product Network for discovery, and enhanced B2B capabilities.
All pricing and features in this guide are verified as of April 2026.
Benefits of using Shopify for your e-commerce business
Before we dive into the nitty-gritty of setting up your Shopify store, let's take a moment to explore the benefits of using this platform. Shopify offers a user-friendly interface that makes it easy for anyone, regardless of their technical expertise, to create and manage their online store. It provides a wide range of customizable themes and templates, allowing you to create a unique and visually appealing storefront. Moreover, Shopify takes care of the technical aspects of running an online store, such as hosting, security, and maintenance, so you can focus on what you do bestselling your products.
Step 1: How to create a Shopify store? Firstly Setting up your Shopify account
The first step in creating your Shopify store is setting up your account. Simply visit the Shopify website and sign up for an account. You will be prompted to provide some basic information about your business, such as your store name, address, and contact details. Once you have completed the sign-up process, you will have access to your Shopify dashboard, where you can start building your store.
- Visit Shopify's Website: Go to the Shopify website at https://www.shopify.com/.
- Sign Up: Click on the "Get Started" button or "Start Free Trial" option on the Shopify homepage.
- Enter Your Email and Password: Provide your email address, create a password, and click "Next."
- Store Name: Enter a unique name for your store. Be creative, as this will be your brand's identity.
- Business Information: Fill out some basic business information, including your full name, address, phone number, and whether you already have products to sell or are just getting started. Click "Next."
- Tell Shopify About Yourself: Answer a few questions about your current selling status and your goals for using Shopify. This information helps Shopify provide tailored advice. Click "Enter My Store."
- Choose a Plan: Shopify offers different pricing plans. Select the plan that suits your business needs. You can start with a 3-day free trial to test the platform, followed by a $1/month introductory rate for your first 3 months. Afterward, you'll need to choose a paid plan. Click "Choose this plan" when you're ready.
- Enter Billing Information: Provide your billing information. This is necessary for subscription fees and transaction processing. You can use a credit card or select an alternative payment method if available in your region.
- Set Up Your Store: After completing the payment information, you'll be taken to your Shopify admin dashboard. Here, you can start customizing your store, adding products, and configuring settings.

Step 2: Choosing a theme for your Shopify store
For a fully custom look, consider working with a professional Shopify theme development team.
One of the great things about Shopify is the wide range of themes and templates it offers. These themes control the overall look and feel of your store, so it's important to choose one that aligns with your brand and target audience. If you need a custom design beyond what templates offer, consider professional Shopify theme development. Explore the Shopify theme store and browse through the different options available. Consider factors such as layout, color scheme, and functionality when making your decision. Once you have chosen a theme, you can customize it to suit your preferences and add your branding elements.
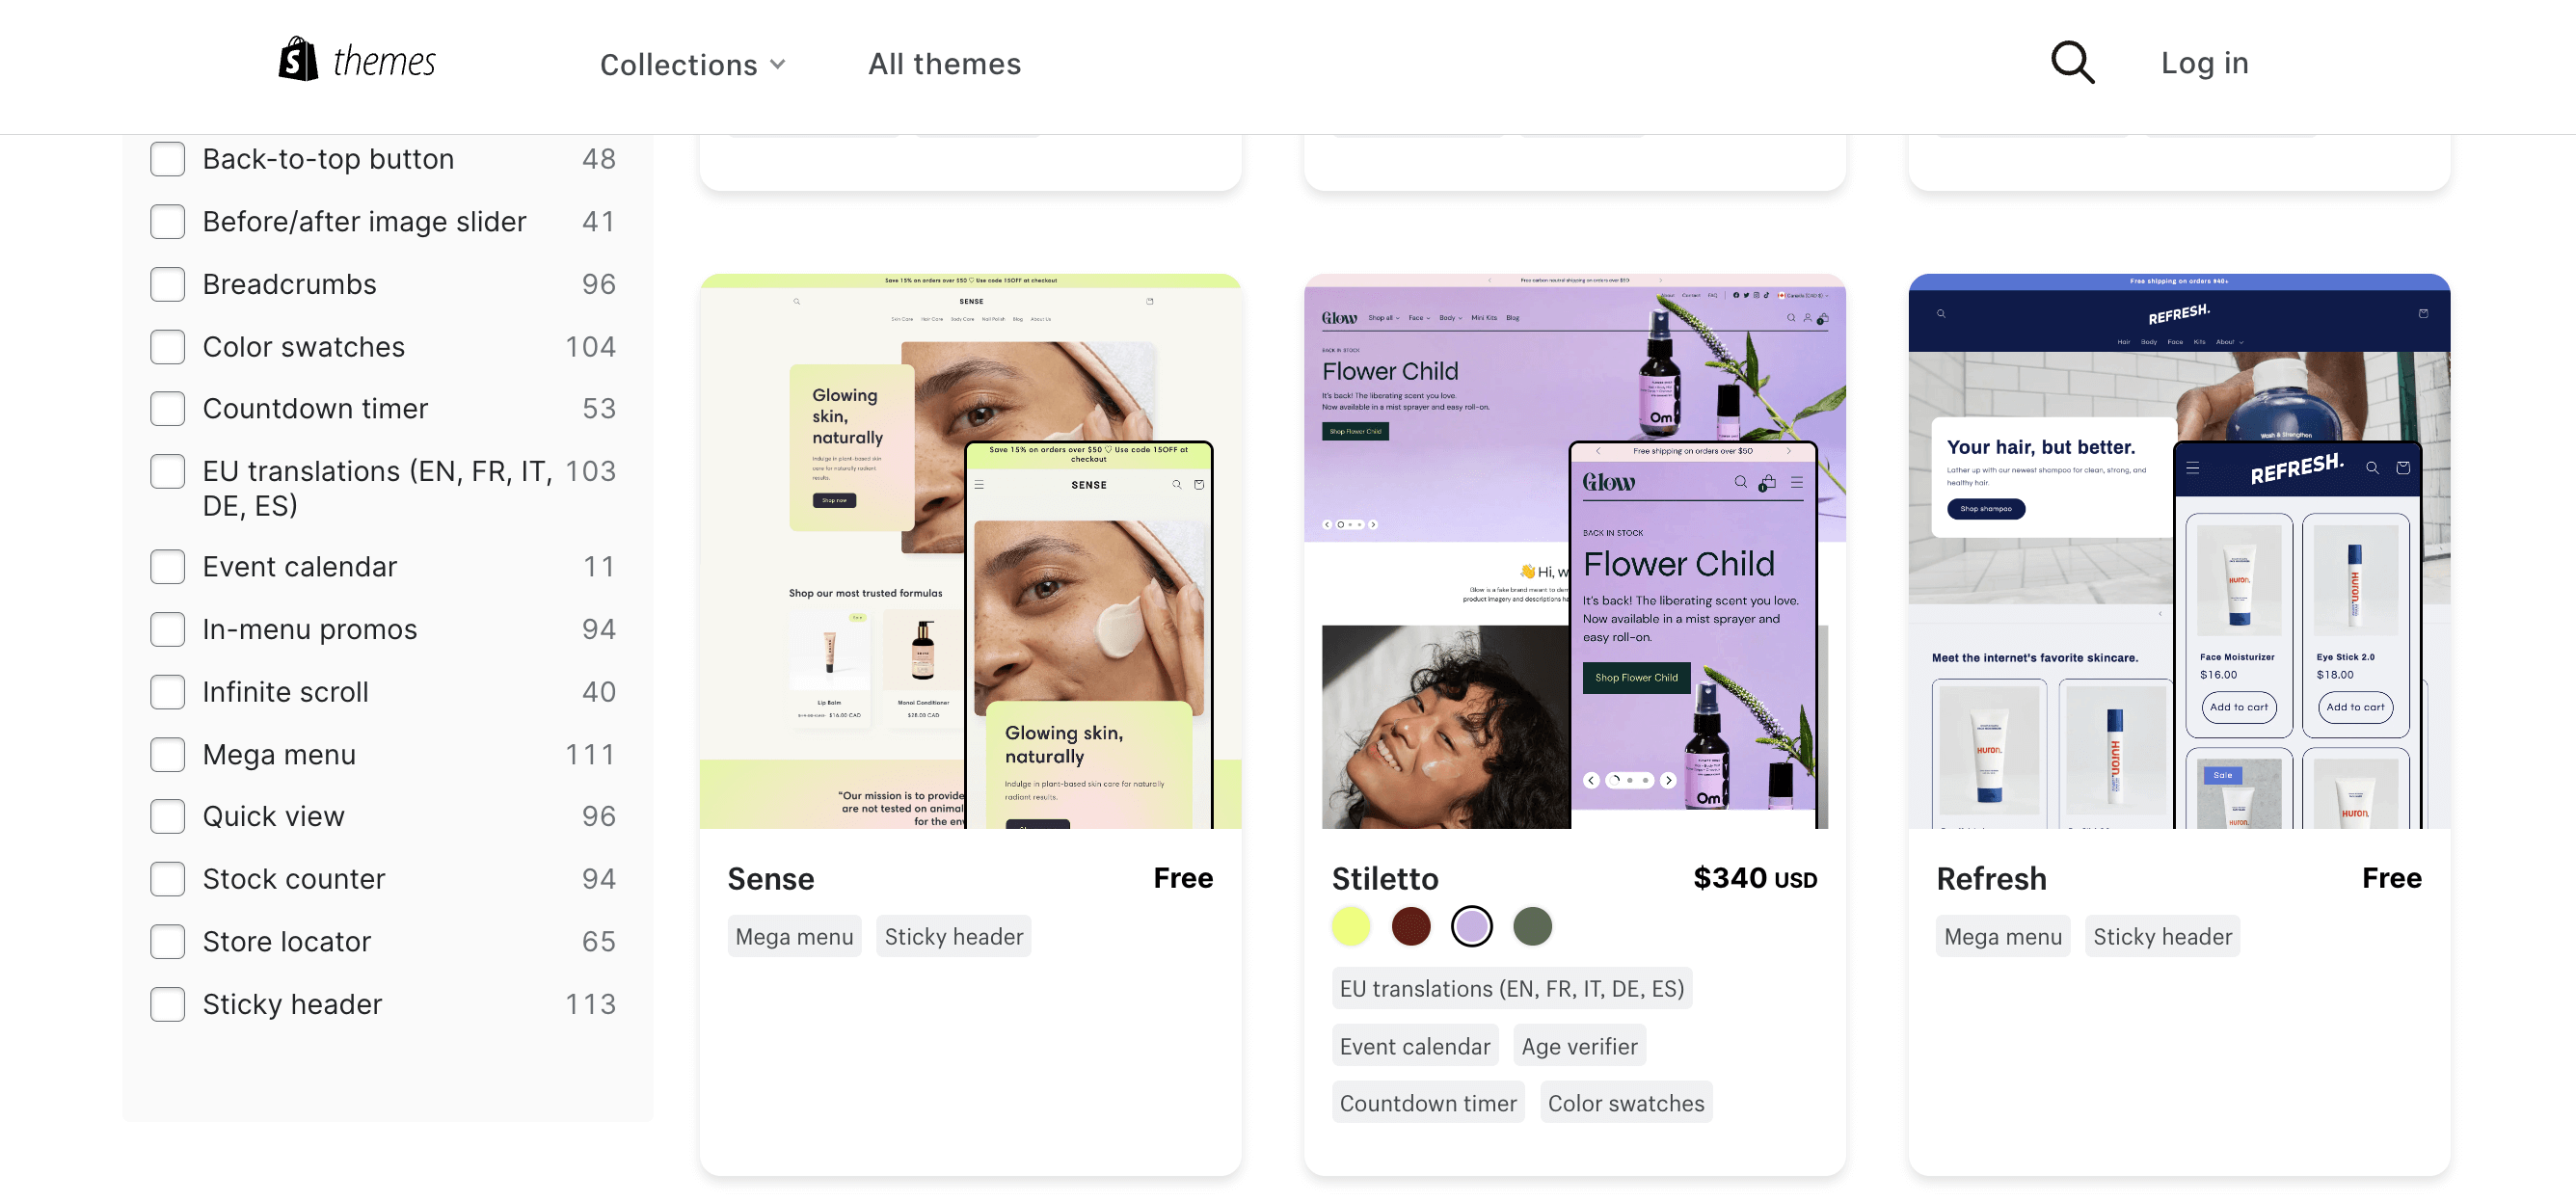
Choosing the right Shopify theme for your business is a crucial step in creating a visually appealing and functional online store. Here are some steps and tips to help you select a suitable theme for your Shopify store:
- Know Your Brand and Niche: Understand your brand identity and the specific needs of your business. Consider your niche, target audience, and the type of products you sell. Your theme should align with your brand's style and appeal to your target customers.
- Budget Considerations: Some Shopify themes are free, while others are paid. Determine your budget for a theme. Premium themes often offer more customization options and features, but free themes can still work well if chosen carefully.
- Responsive Design: Ensure the theme you choose is responsive, meaning it adapts seamlessly to different screen sizes and devices. Mobile responsiveness is crucial for user experience and SEO.
- Browse the Shopify Theme Store: Visit the Shopify Theme Store within your Shopify admin dashboard. Here, you can browse and explore a wide variety of themes. Themes are categorized based on industry and style, making it easier to find options that match your business.
- Read Theme Descriptions: Click on the themes you're interested in to view their descriptions. Pay attention to the features and functionalities each theme offers. Look for themes that align with your business needs, such as product display options, navigation menus, and customization capabilities.
- Check Out Theme Demos: Most themes allow you to preview demos. Take advantage of this to see how the theme looks and functions in action. Pay attention to the layout, typography, color schemes, and overall design.
- Customer Reviews and Ratings: Read customer reviews and ratings for the themes you're considering. This can provide insights into the theme's performance and any potential issues reported by other users.
- Customization Options: Ensure the theme allows for customization to match your brand's unique style. Look for themes with a user-friendly interface for making design changes and adjusting settings.
- Support and Documentation: Check whether the theme comes with comprehensive documentation and customer support options. A theme with good support can save you time and frustration when setting up your store.
- Check Compatibility: Ensure the theme is compatible with the latest version of Shopify. Outdated themes may not receive updates and could cause issues in the future.
- Consider SEO Features: Look for themes that are SEO-friendly. Clean, well-structured code and customizable meta tags are important for optimizing your store's search engine visibility.
- Think About Scalability: Consider your long-term goals. A theme that allows for scalability and additional features as your business grows can be a wise choice.
- Ask for Recommendations: If you're unsure which theme to choose, you can seek recommendations from Shopify experts, forums, or online communities.
- Trial and Error: Don't be afraid to experiment with different themes. Shopify allows you to change themes easily, so you can test a few to see which one works best for your business.
- Consider Premium Themes: Premium themes often offer more advanced features, customization options, and support. If your budget allows, investing in a premium theme can be a worthwhile investment for your business's online presence.
Once you've chosen a theme, install it and start customizing it to match your brand's style and requirements. Regularly review and update your theme as needed to keep your online store fresh and engaging for your customers.
Step 3: Customizing your Shopify store's appearance
Need unique functionality beyond standard themes? Explore custom Shopify sections to build tailored content blocks for your store.
Now that you have chosen a theme, it's time to customize your store's appearance. Shopify provides a user-friendly editor that allows you to make changes to your theme without any coding knowledge. You can customize elements such as the logo, colors, fonts, and images to create a cohesive and visually appealing storefront. Additionally, you can create navigation menus, add banners and slideshows, and rearrange the layout of your store to optimize the user experience.
Step 4: Adding products to your Shopify store
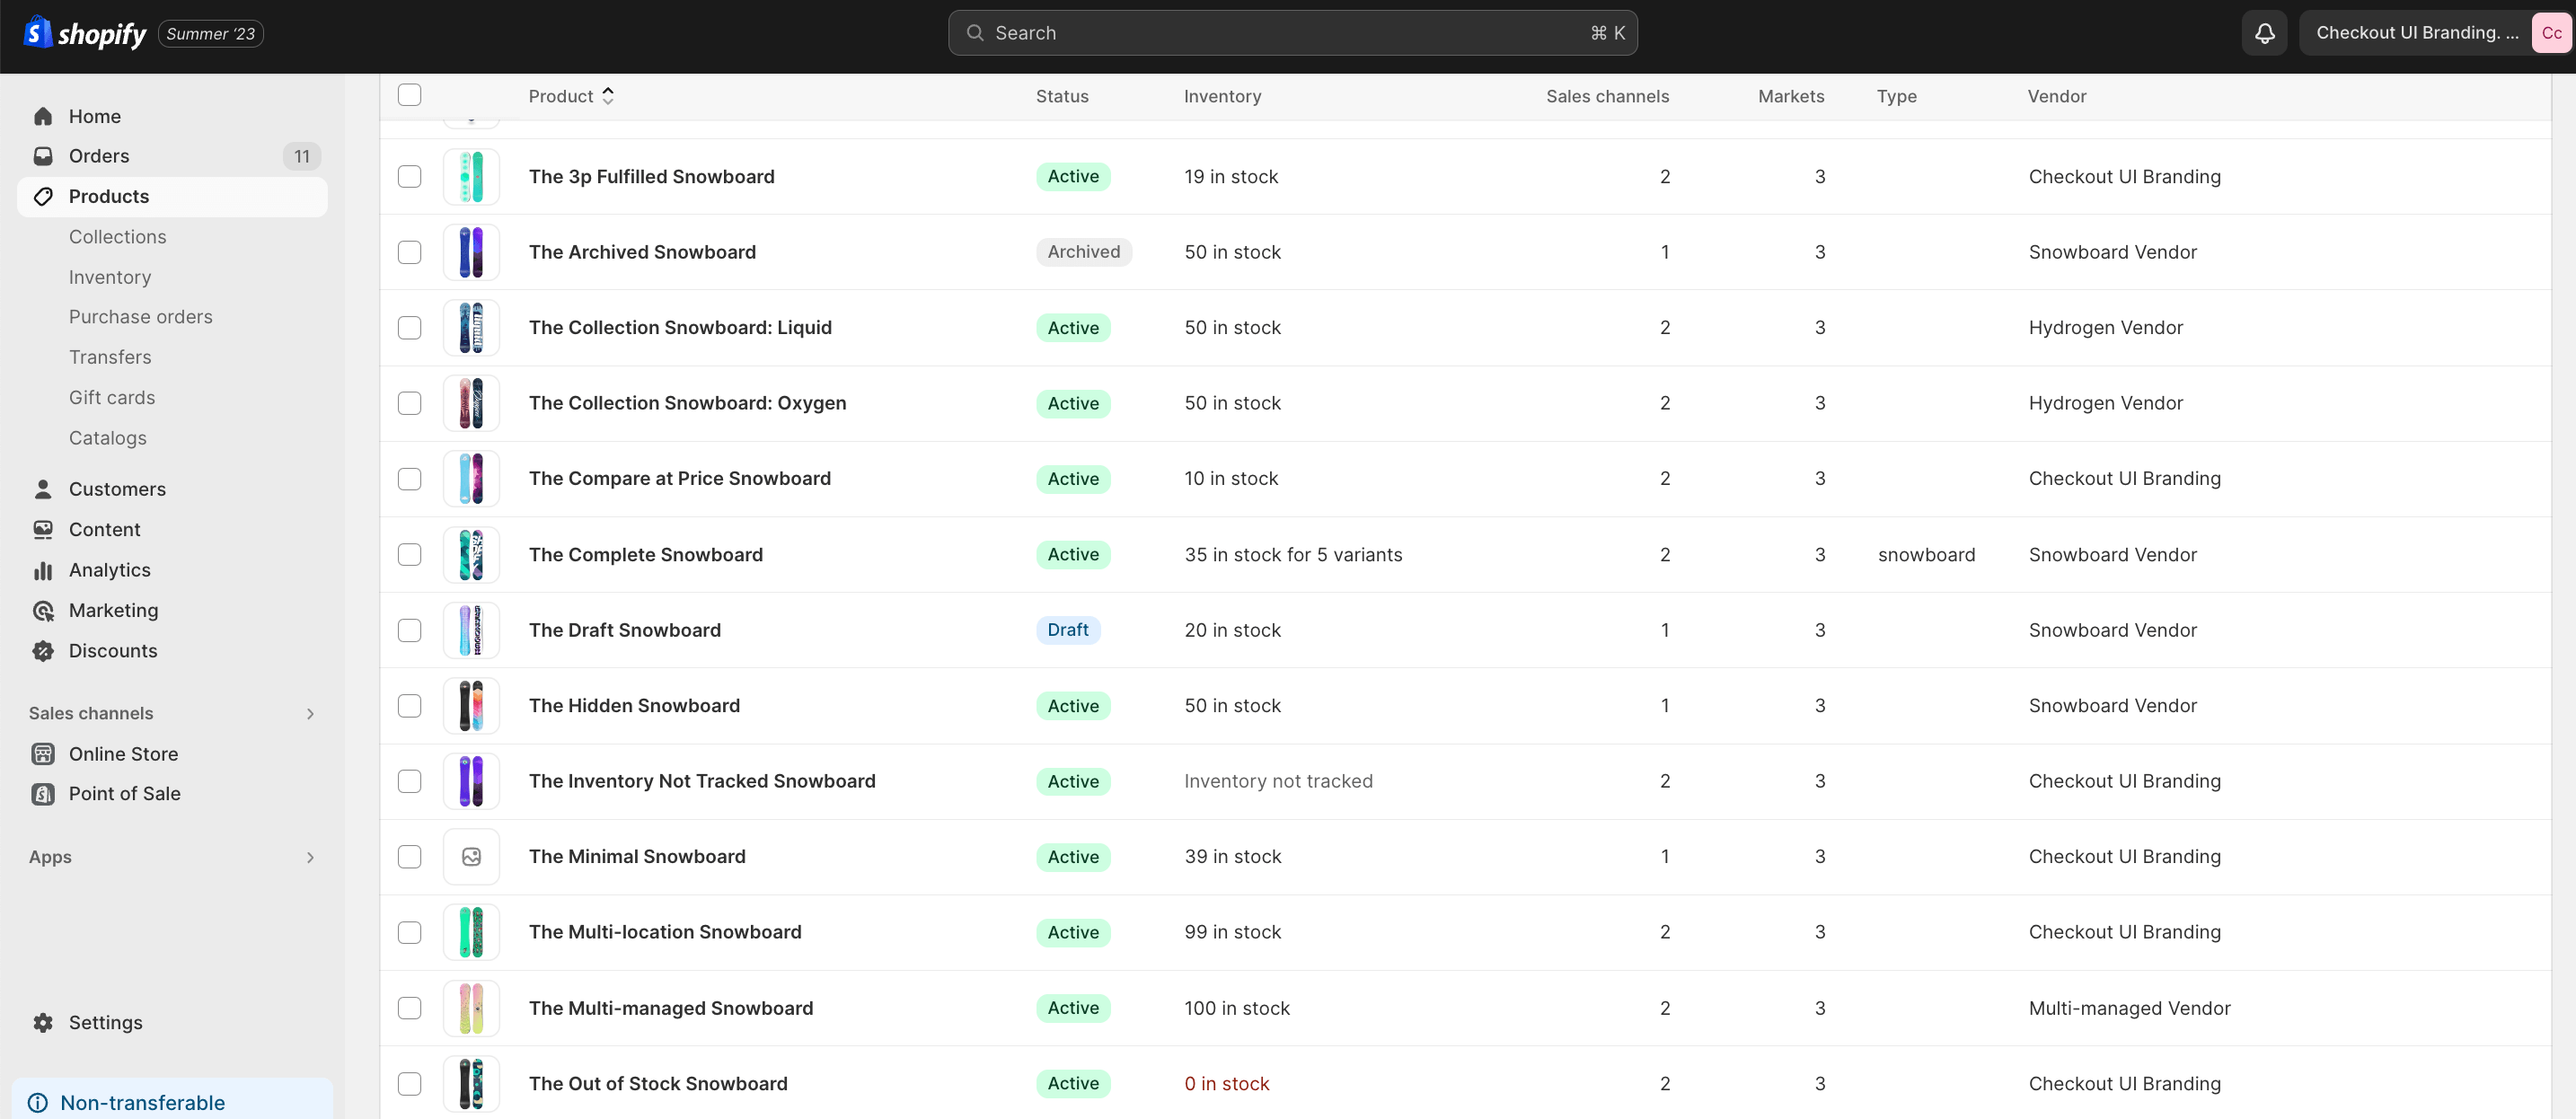
With the visual aspects of your store in place, it's time to start adding products. In your Shopify dashboard, navigate to the "Products" section and click on "Add product." Fill in the relevant details for each product, including the title, description, price, and images. You can also organize your products into categories and collections to make it easier for customers to navigate your store. Don't forget to optimize your product listings with relevant keywords to improve your store's visibility in search engines.
Adding products to your Shopify store is a fundamental step in setting up your online business. Here's a step-by-step guide on how to add products to your Shopify store:
- Log in to Your Shopify Account: Go to the Shopify website and log in to your account using your credentials.
- Access Your Shopify Admin Dashboard: Once logged in, you'll be directed to your Shopify admin dashboard.
- Navigate to the "Products" Section: In your admin dashboard, locate and click on the "Products" option in the left-hand sidebar. This will open the products management section.
- Click on "Add Product": On the Products page, click the "Add product" button to start creating a new product listing.
- Enter Product Details: You'll now be prompted to enter various details about your product. Here's what you'll typically need to fill out:
- Title: Enter the name of your product.
- Description: Write a detailed description of the product, including its features, benefits, and any necessary information.
- Images and Videos: Add high-quality images and videos of your product. Click on the "Add media" button to upload files from your computer.
- Pricing: Set the product's price. You can also schedule sale prices if needed.
- Inventory: If you have multiple variants of the product (e.g., different sizes or colors), you can set them up here. Specify the SKU (Stock Keeping Unit), barcode, and quantity in stock.
- Shipping: Configure the product's weight, dimensions, and shipping options.
- Variants: If applicable, create variants for the product, such as size or color options.
- Collections: Assign the product to one or more collections (categories) on your store.
- Tags: Add relevant tags to help organize and categorize your products.
- Search engine listing preview: Optimize the product's SEO by entering a title and meta description.
- Availability: Choose whether the product is published and available for purchase.
- Save the Product: Once you've filled out all the necessary details, click the "Save" button at the top or bottom of the page to save the product listing.
- Repeat for Additional Products: If you have more products to add, simply repeat the process by clicking "Add product" again in the Products section and filling out the details for each new product.
- Edit or Manage Products: To make changes to existing products, return to the "Products" section of your Shopify admin dashboard. You can click on a product to edit its details or manage its inventory.
- Organize and Promote Your Products: After adding your products, you can further organize them into collections, set up discounts or sales, and promote them through your online store's pages, homepage, and marketing campaigns.
- Preview and Test: Before making your store live, it's a good practice to preview your products and test the shopping experience to ensure everything is set up correctly.
That's it! You've successfully added products to your Shopify store. Keep in mind that Shopify provides various tools and features to help you manage your inventory, track sales, and optimize your product listings for better visibility in search engines. Regularly update and maintain your product listings to keep your store fresh and engaging for your customers.
Step 5: Setting up payment gateways and shipping options
Learn more about the native payment solution in our Shopify Payments guide.
To ensure a smooth shopping experience for your customers, it's important to set up secure and convenient payment gateways and shipping options. Read our complete Shopify Payments guide to understand fees, setup, and the best payment configuration for your store. Shopify offers a variety of payment gateways, such as PayPal, Stripe, and Shopify Payments, which allow customers to make purchases using their preferred method. You can also set up shipping options, including flat rate, weight-based, or location-based shipping. Make sure to clearly communicate your shipping policies and any additional costs to your customers to avoid any surprises during the checkout process.
Step 6: Optimizing your Shopify store for SEO
SEO is critical for organic growth. For a comprehensive approach, explore Mgroup's Shopify SEO marketing services to boost your store's visibility in search results.
How create shopify store.
Now that your store is up and running, it's time to optimize it for search engines. Search engine optimization (SEO) plays a crucial role in driving organic traffic to your store. Start by conducting keyword research to identify the terms and phrases your target audience is searching for. Use these keywords strategically in your product descriptions, meta tags, and URLs to improve your search engine rankings. Additionally, optimize your images, improve your page loading speed, and create high-quality content to enhance the overall SEO performance of your store.
Step 7: Launching your Shopify store
Congratulations! You have successfully created your Shopify store. But before you officially launch it, take some time to ensure everything is in order. Test the functionality of your store, including the checkout process, to make sure everything is working smoothly. Double-check your product listings for any errors or inconsistencies. Set up your store's domain name and ensure it is properly connected to your Shopify account. Finally, prepare a marketing plan to promote your store and attract customers once it goes live.
How long does it take to create a Shopify store?
The time it takes to create a Shopify store can vary depending on various factors, such as the complexity of your store's design and the number of products you plan to sell. Generally, it can take anywhere from a few hours to a few weeks to set up and launch a fully functional Shopify store. However, it's important to note that creating a successful e-commerce business requires ongoing effort and dedication beyond the initial setup phase.
How much does it cost to create a Shopify store?
The cost of creating a Shopify store depends on your specific needs and requirements. Shopify offers different pricing plans to accommodate businesses of all sizes. The Basic plan starts at $39 per month ($29/month if billed yearly) and includes all the essential features you need to get started. Shopify also offers the Grow plan at $105/month and the Advanced plan at $399/month for scaling businesses. As your business grows, you can upgrade to higher-tier plans that offer additional features and benefits. Additionally, keep in mind that there may be additional costs associated with customizing your store's design, purchasing a domain name, and marketing your products.
Tips for creating a successful Shopify store
Creating a successful Shopify store goes beyond the technical aspects of setting up your store. Here are some tips to help you maximize your e-commerce potential:
- Understand your target audience: Take the time to research and understand your target audience's needs and preferences. This will help you tailor your product offerings and marketing efforts to effectively reach and engage your potential customers.
- Invest in high-quality product images: Visual appeal plays a crucial role in attracting and converting customers. Invest in professional product photography to showcase your products in the best possible light.
- Provide exceptional customer service: Delivering a great customer experience is key to building customer loyalty and driving repeat business. Respond to customer inquiries promptly and go the extra mile to ensure their satisfaction.
How to create a development store in Shopify
If you prefer to have experts handle the technical setup, Mgroup offers full Shopify store development services from concept to launch.
If you are a developer or designer looking to create and test custom themes or apps, Shopify offers the option to create a development store. A development store allows you to experiment with different features and functionalities without affecting your live store. To create a development store, simply log in to your Shopify account and navigate to the "Settings" section. Under the "Account" tab, click on "Development stores" and follow the prompts to set up your development store.
How to create a one product Shopify store
A one product Shopify store is a great option if you are focusing on selling a single product or a small range of related products. To create a one product store, follow the same steps outlined in this guide but focus on showcasing your product in the most compelling way possible. Use high-quality images, detailed product descriptions, and customer testimonials to build trust and generate interest in your product.
How to create a professional Shopify store
A professional store starts with strong eCommerce branding. Consistent visual identity across your store builds trust and improves conversion rates.
Creating a professional Shopify store involves paying attention to every detail, from the design and layout to the product listings and customer experience. Here are some tips to create a professional-looking store:
- Choose a clean and modern theme that aligns with your brand.
- Invest in high-quality product images and provide detailed and accurate product descriptions.
- Optimize your store's navigation and make it easy for customers to find what they are looking for.
- Offer multiple payment options and clearly communicate your shipping policies.
- Provide exceptional customer service and respond to customer inquiries promptly.
Conclusion
Creating a Shopify store is an exciting endeavor that can unlock your e-commerce potential. By following this step-by-step guide, you can set up a professional and successful online store that attracts customers and drives sales. Remember to continuously optimize your store, stay up to date with industry trends, and provide exceptional customer service to ensure the long-term success of your Shopify store. If you need assistance in creating your Shopify store, don't hesitate to contact Mgroup, our expert team is ready to help you take your e-commerce business to the next level.
FAQ
How do you start with how to create a Shopify store?
Start by signing up on Shopify, entering your business details, choosing a plan, and opening the admin dashboard. From there, you can begin building your shopify store.
What should I consider when choosing a theme for a Shopify store?
Choose a theme that matches your brand, works well on mobile, and supports the layout and features you need. The article also recommends checking SEO features and theme support.
What are the basic steps for adding products to a shopify store?
Go to Products, click Add product, then enter the title, description, price, images, variants, inventory, collections, and SEO details before saving the listing.
How long does it take to create a Shopify store?
The article says how long does it take to create a shopify store depends on design complexity and product count. Setup can take a few hours to a few weeks, depending on your needs.
How much does it cost to create a Shopify store?
The article notes that Shopify offers different pricing plans and a 14-day free trial. After the trial, you need a paid plan, but the exact cost depends on the plan you choose.

")


