Shopify 2.0. How to migrate your Shopify Store
 November 18, 2021
 Shopify 2.0 provides a great number of new functions and themes (shopify theme) for merchants. There are lists of functions and improvements, which makes themes in your Shopify Store and applications easier in development, flexible, and more comfortable for maintenance. Let’s discuss new features from Shopify. Migrate shopify store has never been so easy!
What's new in Shopify 2.0
The new editor
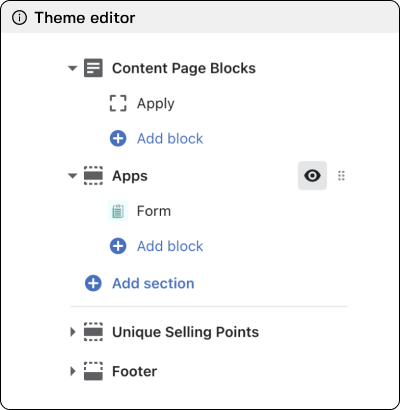
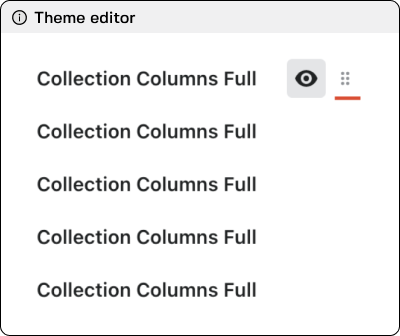
Now you can add sections for all pages, not only for Home Page, which opens new capabilities for the store and personalise elements. The idea of the new editor was to centralise all available features and functionality.
Every kind of page can be displayed using a JSON template file containing the listed sections of the page and settings data connected with every additional section, which merchants add or edit.
Stores can have several template files, which are displayed on different products. collections pages, customer pages, blog posts, etc. This helps merchants to place different goods, collections, and other pages in one store easily.
After adding JSON template, merchants can proceed to theme editor and add any section, which contains preset settings — this is the way how you earlier added dynamic sections at Home Page.
App blocks option
To resolve these problems, we make customisations of applications for developers. This allows extending apps to merchant’s theme using programs’ blocks.
Shopify Metafields
The new theme version allows adding metafields and properties without the usage of applications’ API or custom code.
Now you can add exactly that content, which you need at the product page, for example, a list of ingredients, size chart, etc.
You can learn more about metafields in Shopify documentation.
Easy File uploading (images, PDFs files)
Metafields file selection tool makes downloading and choosing files on pages easier. All your images will be kept by the link Settings/ Files, automatically available for usage in the future.
Files API
Developers will have access to settings/files with the help of new API files. GraphQL API (2021–07 version) makes downloading and choosing available media files easier using settings/files. Applications can use access to the administration area, filling metafields with content.
Liquid Input Setting
From the editor, you can allow a new Liquid input setting that will allow merchants to add custom Liquid code.
Liquid customizing is similar to HTNL customizing. The only difference is that you get access to Liquid’s variables. Merchants can get access to global objects as well as to specific templates in Liquid.
New developer tools
New development features integrate and help in testing, coding, and creating new themes.
GitHub Integration makes usage of both Shopify CLI tools and Themes checking easier. Both tools allow us to test in isolated development environments and make development easier.
Theme check
Language servers for Liquid and JSON scan themes and seek for errors. After scanning the instrument highlights the best cases for platform Shopify, Liquid.
This feature integrates with such editors as Visual Studio. Error messages with a link to the validation error appear so that you can understand the issues that persist. The validation theme comes with the Shopify CLI tool, so you don’t need to install it separately.
You can also read more about updates at https://www.shopify.com/partners/blog/shopify-online-store with examples and detailed descriptions
Shopify store 2.0. Migrate Shopify store step by step
Let’s review the process of transitioning your Store to Shopify in more detail.
1. Choose your shopify theme
Before the start, you should choose the theme to which you plan to upgrade to version 2.0 and create a backup of the theme. We recommend doing this locally using the Shopify CLI, so download the theme files.
2. Sections {% section %} tags
To start transforming your Liquid template to a JSON template, you should remember which sections you used in the template and how they were placed. Please reference the example of the template’s file product.Liquid
We should delete tags from files.
After deleting tags { % section % } from template’s code, we should decide where to place it. You can move code into an existing or new section.
3. Delete template.
After copying code from the product.liquid delete product.liquid from catalog /templates. It is because it will be replaced with a product.json file and product.liquid file and product.json file can not be kept in catalog /templates simultaneously.
4. Create a JSON template file
After you delete the file product.liquid you can replace it with a JSON template.
- create a new file (template) in directory /templates with the name product.json
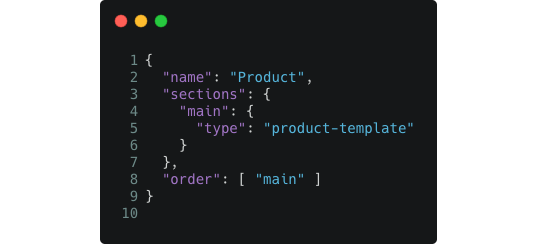
- after you create the file, replace it with any code in file by code given below and save changes:
“name”: “Product” template name
“type”: “product-template” this property must specify the name of the section we are using. See step 2.
5. Test template.
After creating a new template, make sure you upload everything correctly.
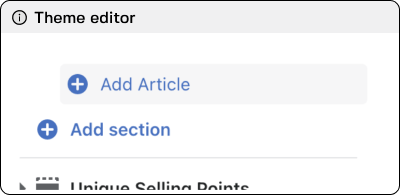
Open the theme editor and go to the product page. There should be a button to add a section on the left sidebar. All sections that were previously only available on the main page should now appear in the “Add section” menu.
6. Add references to the sections
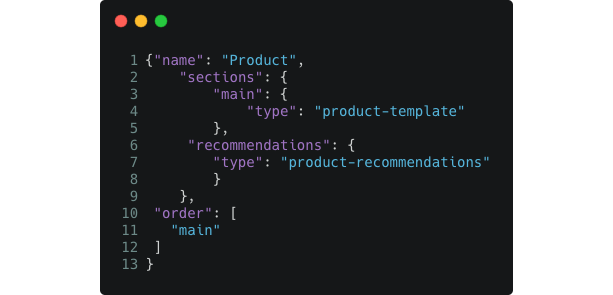
If the source file of the product.liquid template contains links to additional sections such as the product recommendations section, then you can define them in the product.json file and then determine their order.
If we open the product.json file. you will find their only main section, which we created above.
Of the sections we remembered above, only one has been added, now you need to add a second section with recommendations. We need to select it from the sections that we can now use for all pages in the left sidebar.
Then the structure of the product.json file will change.
Now you get an opportunity to change sections order.
If you want to allow adding of apps’ blocks to a section in your theme, you will need to make the following changes to the section code:
Add the necessary schema
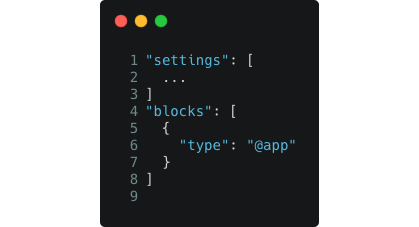
To allow adding apps’ blocks into sections, you will need to add blocks of kind @app to the section’s schema. Blocks of the kind @app are not supported in the static section.
For example, to add apps block’s support to the debut-template of the product, you can add the code provided below. s the section doesn’t contain any blocks, you can add a new bunch of blocks after the schema settings bunch.
Render app blocks
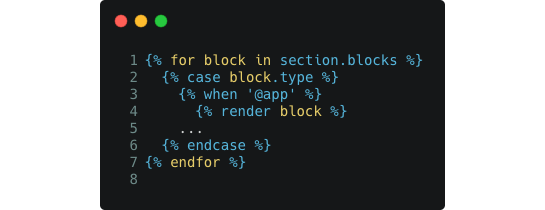
To display an application block in your theme, check the appropriate type, and then visualise the block with the {% render block%} tag. You can add this code wherever it makes sense for your section.
9. Repeat steps
You can repeat all steps to transfer all templates.
So how to transfer your store based on Shopify to 2.0 version? Follow us on our social networks where we describe the process step by step and share our experience.
If you are interested in developing or transfering your eCommerce solutions on Shopify, reach out to our team of expert developers that will handle the project from start to finish!

