
Setting up email marketing feels overwhelming with its many configuration options and technical requirements. The good news is that ActiveCampaign setup doesn't need to be complicated or time-consuming.
ActiveCampaign stands out as a powerful email marketing and CRM platform that combines automation capabilities with user-friendly features. Many ActiveCampaign reviews highlight its reliable functionality. The original setup process becomes simple when you follow the right steps. We created this detailed guide to help you through the setup process, starting from account creation to your first automation sequence.
This step-by-step guide shows you exactly how to set up ActiveCampaign. You'll learn everything from simple account configuration to advanced features like automation workflows and website integration. The guide will help you get started quickly whether you're comparing ActiveCampaign alternatives or ready to head over to the platform.
Creating Your ActiveCampaign Account
Starting your trip with ActiveCampaign requires a proper account setup. We'll help you pick the right plan and walk you through registration.
Choosing the right plan
ActiveCampaign has flexible pricing options that match different business needs. You'll be glad to know there are no setup costs or hidden fees. Their month-to-month plans let you cancel anytime. You can start with a 14-day free trial and send up to 100 emails.
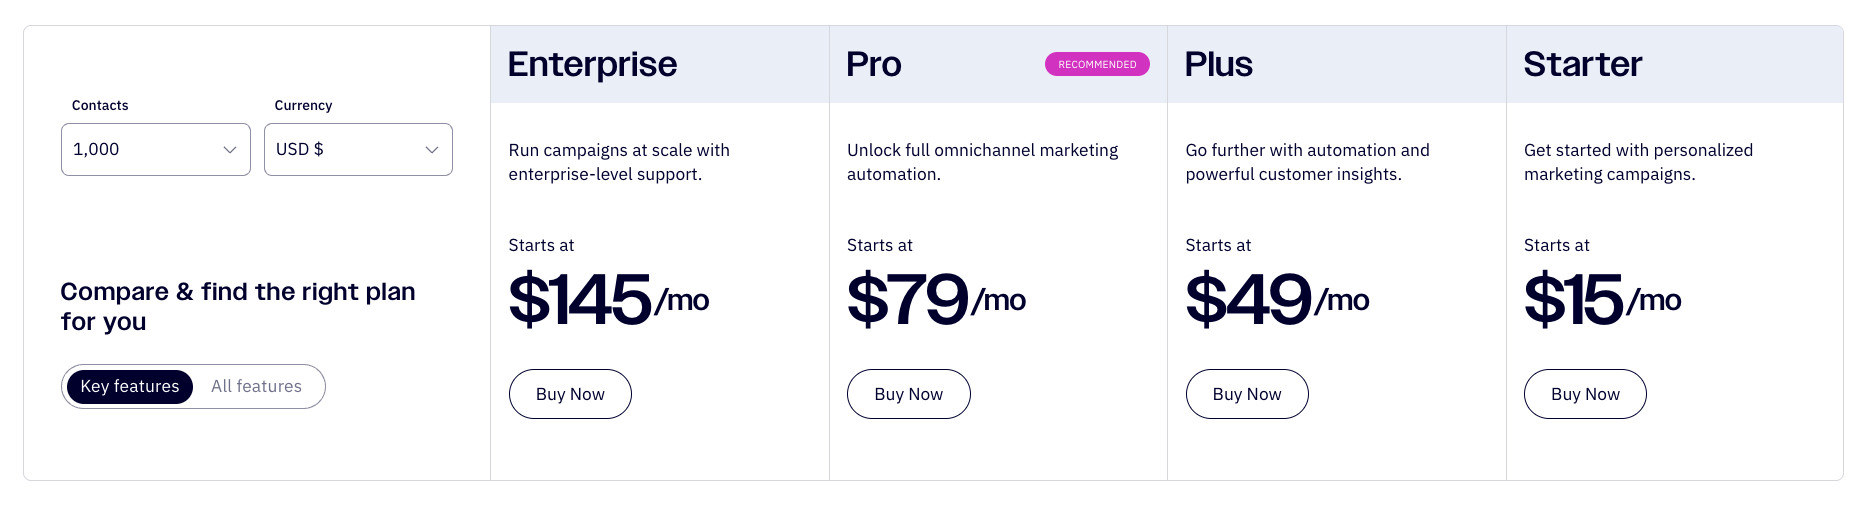
The platform has four main plans:
- Starter Plan: Perfect for simple email marketing
- Plus Plan: Ideal for advanced marketing automation
- Professional Plan: Designed for omni-channel marketing
- Enterprise Plan: Built for detailed security and support
Account registration process
Getting your ActiveCampaign account ready is easy. Here's how to begin:
- Visit the ActiveCampaign homepage
- Enter your email address to begin
- Provide your name and phone number
- Specify your contact volume and industry
- Select your current business tools and integrations
- Create a secure password (minimum 10 characters)
Dashboard orientation
Once you log in, you'll see the Marketing Dashboard - your central command center. The dashboard gives you quick access to your most important metrics and performance indicators.
Your dashboard options will match your needs:
- Marketing Dashboard: Your main view for campaign metrics
- Sales CRM Dashboard: For tracking customer relationships
- Ecommerce Dashboard: Shows performance metrics for connected stores
You can customize these dashboards to match your priorities. On top of that, it helps to create an ActiveCampaign bookmark folder for essential resources like the login page, Education Center, and Help Center.
Essential First-Time Configuration Steps
You've created your account. Let's look at the key configuration steps that will help your emails reach inboxes while keeping your account secure. Setting these elements up correctly will make a big difference in your email marketing success.
Setting up your sender information
Your sender details need proper setup to build trust with recipients. Here are the main steps you should take:
- Go to Settings > Advanced
- Configure your 'From' name and email address
- Ensure your sending domain is older than 30 days
- Point your domain to a valid website
- Set up your business address for compliance
Configuring domain authentication
Domain authentication has become essential, especially since February 2024. Gmail and Yahoo now need DKIM and DMARC authentication for successful delivery. We give you two ways to authenticate:
- Configure Domain Option: This recommended approach sets up all DNS records automatically
- Manual Setup: You get step-by-step guidance for custom configuration
Good authentication stops email spoofing and helps more emails reach inboxes. That's why you should set up all three authentication methods: SPF, DKIM, and DMARC.
Establishing simple security settings
Your data needs protection and your account needs to stay safe. We've built strong security measures. Multi-factor authentication (MFA) is our main security feature with two ways to verify:
- Authentication App: This creates six-digit verification codes
- SMS Text Messages: You get codes on your mobile device
Account administrators can make MFA mandatory for everyone or just specific team members. The platform spots unusual login attempts and asks for extra verification automatically.
Keep your recovery codes in a separate place and avoid logging in from public networks to stay secure. These security measures keep your ActiveCampaign account safe while letting authorized users access it easily.
Building Your First Email List
Your email marketing success depends on building a quality email list. Let us show you how to create high-quality lists that boost participation and deliver results.
Creating signup forms
Quality signup forms lay the foundation for successful list building. ActiveCampaign gives you several form options that match your needs:
- Inline forms: Perfect for embedding within your content
- Floating bars: Ideal for non-intrusive visibility
- Modal popups: Great for lead magnets
- Preference centers: Excellent for subscriber management
Clear value propositions make your forms work better. A well-designed lead magnet that solves specific problems within 10 minutes to 2 days generates the most email opt-ins.
Importing existing contacts
ActiveCampaign makes it easy to bring your existing contacts into the platform. Here's the quickest way to import:
- Prepare your CSV file (remove empty rows and columns)
- Go to Contacts > Import
- Choose import method (CSV, copy/paste)
- Map your custom fields
- Select lists and tags
- Review and confirm
Our free migration service helps you move from other platforms. The service transfers your lists, contacts, custom fields, and tags.
Setting up list segments
List segmentation lets you send targeted messages that appeal to specific audience groups. A segment groups contacts based on specific conditions, including actions, website visits, field values, and contact tags.
Fewer broad lists combined with tags and custom fields create better detailed segmentation. This method helps improve:
- Email deliverability
- Sender reputation
- Inbox placement
- Campaign performance
Dynamic groups update automatically based on contact behavior and characteristics through proper segmentation. You might group contacts by industry, product interest, or engagement levels.
The segment builder tool appears throughout the ActiveCampaign platform and helps strengthen your segmentation strategy. This versatile feature creates precise audience segments for targeted campaigns and automations.
Setting Up Basic Automation
ActiveCampaign's power comes from its automation capabilities. Let's help you set up your first automation to get the most out of this platform.
Creating a welcome sequence
A welcome sequence is a great way to get your first chance to introduce yourself and turn prospects into customers. You should create a 4-6 email welcome series. This gives you enough room to build trust before moving toward sales. Here's how to set up a simple welcome sequence:
- Click "Automations" in the top menu
- Select "Create an automation"
- Choose "Subscribes to a list" as your trigger
- Add a welcome email action
- Configure sender details
- Design your email content
Welcome emails get the highest open and click-through rates. This makes them vital for showcasing important calls to action.
Setting up trigger events
ActiveCampaign goes beyond simple email sequences by offering more than 20 unique start triggers for automations. You can add multiple triggers to the same automation. This lets contacts who meet different criteria enter a single workflow.
Key factors to think about when setting up trigger events:
- Contact actions (form submissions, email opens)
- Time-based conditions
- Custom field updates
- Goal achievements
- Website interactions
Keep in mind that triggers only work for actions that happen after you activate the automation - they're not retroactive.
Testing your automation workflow
You need to really test your automation before launch to make sure everything works right. A test contact helps you check for any issues.
Steps to test effectively:
- Create a test contact with an available email/phone
- Add the test contact to the automation
- Monitor the contact's progress through each step
- Check email deliverability
- Verify trigger conditions
You can send up to 25 test emails at once during bulk testing. Accounts with fewer than 1,000 contacts should test quarterly, while more active accounts need monthly testing.
Good testing ensures your automation works exactly as planned. You can skip wait steps during testing to quickly verify the whole workflow.
Integrating With Your Website
Website integration with ActiveCampaign is a vital step to get the most out of your implementation. The right integration lets you track and automate your marketing more effectively.
Installing tracking code
Your ActiveCampaign website integration starts with the right site tracking setup. The first step is to activate tracking in your account. Here's what you need to do:
- Navigate to Settings > Tracking
- Enable Site Tracking
- Add your website URL
- Copy the generated tracking code
- Place the code in your website footer
WordPress users can skip manual setup by using the ActiveCampaign plugin. The plugin gives you two tracking choices:
- Track by default - monitors all known contacts
- Don't track by default - requires explicit consent
Connecting forms to your site
Once tracking is ready, you'll need to add your forms. ActiveCampaign gives you four ways to integrate forms:
- Simple Embed - Updates automatically with platform changes
- Full Embed - Offers greater customization options
- WordPress Plugin - Merges smoothly with WordPress sites
- Direct Link - Perfect for email campaigns and social media
Your domain authentication needs to be complete before forms will work properly. This step ensures reliable form submissions and data collection.
Setting up event tracking
Event tracking helps you collect detailed data about your users' actions on your website. This feature lets you:
- Track custom events
- Assign values to specific actions
- Trigger targeted automations
- Create precise audience segments
You'll need to define these tracking details before you start:
$ac->track_actid = "ACCOUNT_ID";
 $ac->track_key = "TRACKING_KEY";
You can link email addresses with specific events for better tracking. This connection helps you track contacts better and create more personalized automation triggers.
A solid marketing automation strategy needs these integration elements working together. The tracking code shows you how users behave, forms capture contact details, and event tracking responds to specific actions with targeted automations.
ActiveCampaign & Shopify
ActiveCampaign and Shopify are a dynamic duo for businesses aiming to take their eCommerce strategies to the next level. Shopify, as a leading eCommerce platform, empowers merchants to build, manage, and scale their online stores with ease. ActiveCampaign, a cutting-edge marketing automation and customer experience platform, integrates seamlessly with Shopify, allowing businesses to connect their marketing and sales efforts in powerful and personalized ways.
Through this integration, Shopify store owners can automatically sync critical customer data, including contact details, purchase history, order values, and even abandoned cart details, directly into ActiveCampaign. This wealth of data opens the door to creating highly customized and automated marketing campaigns. For instance, merchants can segment their audience based on behavior, preferences, or purchase frequency and then send targeted email campaigns that resonate with each group. Whether it’s welcoming new customers, rewarding loyal shoppers with exclusive offers, or re-engaging those who abandoned their carts, the integration ensures every interaction is tailored to individual needs.
Moreover, ActiveCampaign’s automation features make it easy to nurture customer relationships over time. Businesses can set up workflows to send personalized product recommendations, announce sales, or remind customers about products left in their carts. These automations not only save time but also enhance the customer experience, leading to higher satisfaction and increased retention rates.
For Shopify merchants focused on growth, ActiveCampaign also provides tools for advanced reporting and analytics. By tracking the performance of marketing campaigns and understanding customer behaviors, businesses can make data-driven decisions to optimize their strategies. Features like predictive sending and advanced segmentation ensure that the right message reaches the right audience at the perfect time, boosting engagement and conversions.
In addition, ActiveCampaign integrates with other Shopify apps and tools, creating a cohesive ecosystem where all elements of eCommerce and marketing work in harmony. From simplifying workflows to enhancing customer touchpoints, the combination of Shopify and ActiveCampaign provides an all-in-one solution for scaling eCommerce businesses and fostering meaningful, long-term customer relationships. Whether you’re a small business or a large enterprise, this integration offers the tools and insights needed to thrive in a competitive online marketplace.
Conclusion
ActiveCampaign setup might look daunting at first, but this piece breaks down each significant step. A solid foundation for email marketing success starts with proper account configuration, authentication setup, and security measures.
ActiveCampaign's versatile form options and segmentation capabilities make list building simple. The automation features reshape the scene by turning routine tasks into efficient processes. This helps save time while you deliver customized communication to subscribers.
The setup process concludes with website integration that enables precise tracking and targeted responses to user behavior. Note that email marketing success depends on continuous optimization. Better results come from testing automations, refining segments, and tracking engagement metrics regularly.
ActiveCampaign stands out as a powerful yet user-friendly platform when you set it up right from day one. These setup guidelines will help you build an efficient email marketing system that evolves with your business and delivers measurable results.
Our team of experts goes beyond basic setup to deliver customized solutions that align with your business goals. We tailor the integration to optimize ActiveCampaign’s advanced features, such as automated email workflows, personalized product recommendations, cart recovery campaigns, and audience segmentation. Whether you’re looking to re-engage customers who abandoned their carts, reward loyal shoppers, or drive repeat purchases, we design strategies that maximize the impact of your marketing efforts.
At Mgroup SEO & marketing team, we understand that every eCommerce business is unique, which is why we offer end-to-end support to ensure the integration meets your specific needs. From initial setup to advanced customization, our team handles every aspect of the process, including syncing Shopify with ActiveCampaign, configuring automation workflows, and training your team on how to utilize the integration effectively. We also provide ongoing support and optimization services, helping you refine your strategies over time to ensure the integration continues to deliver measurable results.
By partnering with Mgroup, you gain access to a dedicated team that not only understands the technical aspects of Shopify and ActiveCampaign but also how to use these tools strategically to drive growth. Whether your focus is on increasing customer retention, boosting conversions, or streamlining your marketing operations, we provide the expertise and insights needed to achieve your objectives. With Mgroup as your partner, you can confidently integrate ActiveCampaign into your Shopify store and elevate your eCommerce business to new heights.
FAQ
What is ActiveCampaign used for?
ActiveCampaign is an email marketing and CRM platform for automation, list building, segmentation, and website tracking. The setup guide shows how it supports campaigns and customer management.
How do I choose an ActiveCampaign plan?
ActiveCampaign pricing includes Starter, Plus, Professional, and Enterprise plans. The article also notes a 14-day free trial, no setup costs, and month-to-month billing.
What should I configure first in ActiveCampaign?
Start with sender details, domain authentication, and security settings. The guide recommends SPF, DKIM, and DMARC, plus MFA, before sending campaigns from ActiveCampaign.
How do I build my first list in ActiveCampaign?
You can create signup forms, import contacts from CSV, and use tags and custom fields for segmentation. ActiveCampaign also offers dynamic groups that update based on contact behavior.
How do I test an automation in ActiveCampaign?
Create a test contact, add it to the automation, and follow each step to check triggers, delivery, and timing. The article says testing helps confirm the workflow works before launch.

")


